Pages
▼
Monday, September 24, 2012
Thursday, September 20, 2012
Tuesday, September 18, 2012
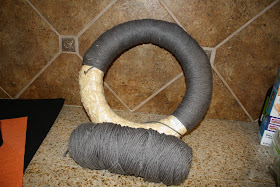
BOO! Halloween Wreath
Inspiration from:http://indiefixx.com/2010/10/19/yarn-it-up/
Supplies:
Yarn
Felt
Ribbon
Wreath
Scissors
Hot Glue Gun
Monday, September 17, 2012
Princess Crown Fabric Wall Decal for Maya
Inspiration from: http://www.madebymarzipan.com/?x=2633
Supplies: Roll of Heat n Bond Ultrahold Cotton fabric Iron (and possibly an extension cord) Clip art image (silhouettes are easiest) Pen & scissors 1) Now that you have your image, let’s get started by ironing your fabric. It needs to be completely wrinkle free. Then, lay the fabric face down and lay down the Heat n Bond on top of it, with the paper side facing up. Iron on top of the paper to adhere it to the fabric. 2) Draw your image directly on top of the paper backing. Remember that you are drawing on the BACK of your decal, so your image will be reversed when you cut it out. Don’t worry if you make a mistake, the paper will be removed and no one will know. 3) Cut out the decal. Iron once more, being sure that all of the edges are secure. Allow to cool completely, then peel off the paper backing. 4) Iron it directly onto the wall. You might need to use an extension cord. 5) To remove the decal, simply peel off. It won’t take off the paint or leave any marks– BUT– you probably won’t be able to reuse the decal once it’s been removed, it loses most of its “stick.” Remember, you can now upload your project images directly to Made By Marzipan, so if you try this, share a pic in the comments section!
Fabric Wall Decals for Aiden
Inspiration from: http://www.madebymarzipan.com/?x=2633
Supplies:
Roll of Heat n Bond Ultrahold
Cotton fabric
Iron (and possibly an extension cord)
Clip art image (silhouettes are easiest)
Pen & scissors
1) Now that you have your image, let’s get started by ironing your fabric. It needs to be completely wrinkle free. Then, lay the fabric face down and lay down the Heat n Bond on top of it, with the paper side facing up. Iron on top of the paper to adhere it to the fabric.
2) Draw your image directly on top of the paper backing. Remember that you are drawing on the BACK of your decal, so your image will be reversed when you cut it out. Don’t worry if you make a mistake, the paper will be removed and no one will know.
3) Cut out the decal. Iron once more, being sure that all of the edges are secure. Allow to cool completely, then peel off the paper backing.
4) Iron it directly onto the wall. You might need to use an extension cord.
5) To remove the decal, simply peel off. It won’t take off the paint or leave any marks– BUT– you probably won’t be able to reuse the decal once it’s been removed, it loses most of its “stick.”
Remember, you can now upload your project images directly to Made By Marzipan, so if you try this, share a pic in the comments section!
Monday, September 10, 2012
Sunday, September 9, 2012
DIY: Yarn Wreath with Felt Flowers
It's almost Fall -- getting the house decorated. My friend, Kat, posted her wreath and I was ready! Off to the craft store I
went for a wreath, yarn, ribbon and felt.
(further inspiration and help from: http://www.danielleburkleo.com/2010/10/diy-yarn-wreath-with-felt-flowers.html)


